Ellipse
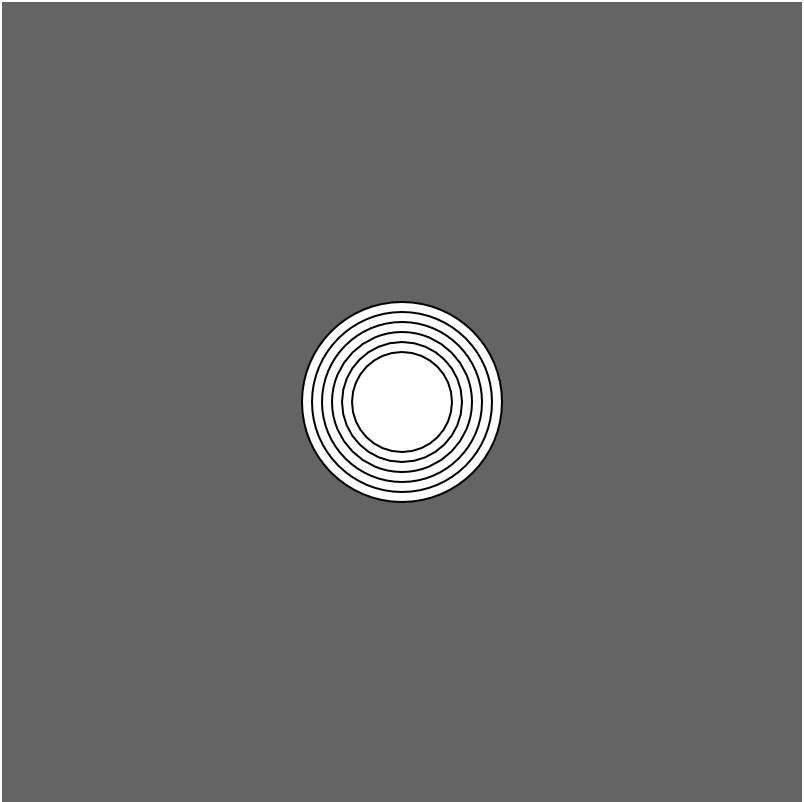
To draw an ellipse you call the elipse() function. This function is like the point() function, but takes two extra parameters. These are the width and height of the ellipse. Let's create 6 ellipses that are inside one another:
ellipse(200, 200, 100, 100);
ellipse(200, 200, 90, 90);
ellipse(200, 200, 80, 80);
ellipse(200, 200, 70, 70);
ellipse(200, 200, 60, 60);
ellipse(200, 200, 50, 50);
With the ellipse() function we can draw an ellipse with different height and width. In principle you can draw any oval. What you can't draw are parts of an oval. This is where the arc() function comes handy. With arc() we can draw parts of a circle. The function is a little more complicated than what we have looked at so far. Like ellipse, the first four parameters are: x-coordinate, y-coordinate, width and height. Then there are two more parameters, the start and end of the arc. If we want to create a half circle, we put 0 at the start, and Pi at the end. Pi is the mathematical notation used for the value that approximates to 3.1416. In p5 we have access to this number by writing PI (in our case s.PI). This is how we create a half circle:
arc(200, 200, 100, 100, 0, s.PI);
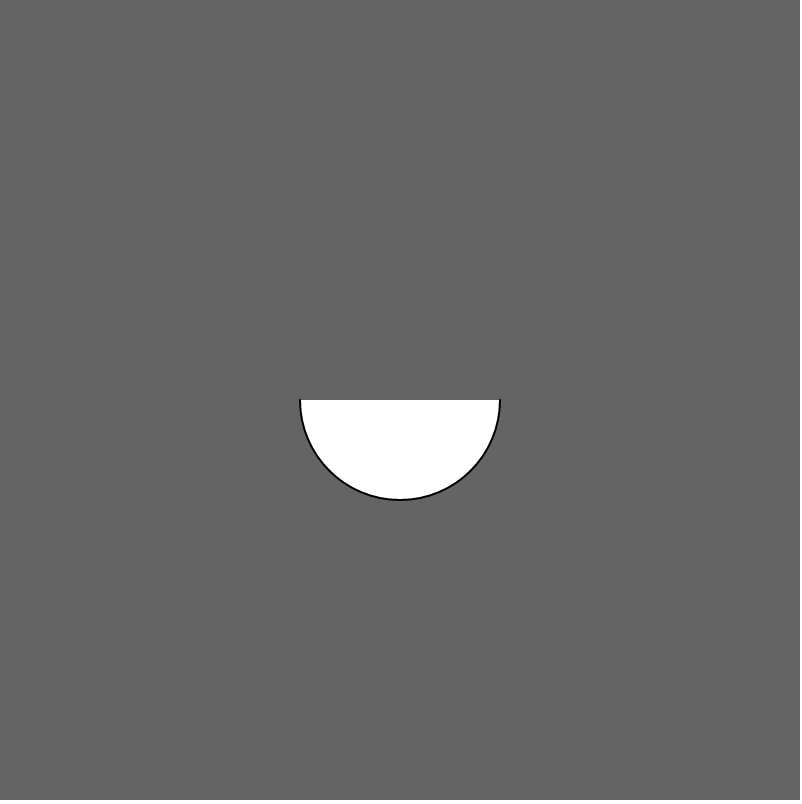
What happens here is that we draw an arc between 0 and Pi. If we draw from Pi to 0, we would have an arc that would be the opposite of what we have drawn. The arc() function works like that. The values that we can plot are from 0 to almost two times Pi. If we draw from 0 to two times Pi (around 6.2832) we will not get a circle. What we get then is nothing. You can try it out yourself. If we want to create a full circle, we need to use the ellipse() function.
Let's create another arc, something that resembles the Pacman figure:
arc(200, 200, 100, 100, 0, s.PI + s.HALF_PI + s.QUARTER_PI);

In the last place we have done something new. We put in more than one value with + between them. What happens here is that the values that we give the function as its last parameter get added up. We will explore this later.
Exercise 3:
This exercise will be the first complicated exercise of the book. I want you to draw a face. You don't need to get the same result as me, but using the functions you have learned so far, try to get as close as you can.
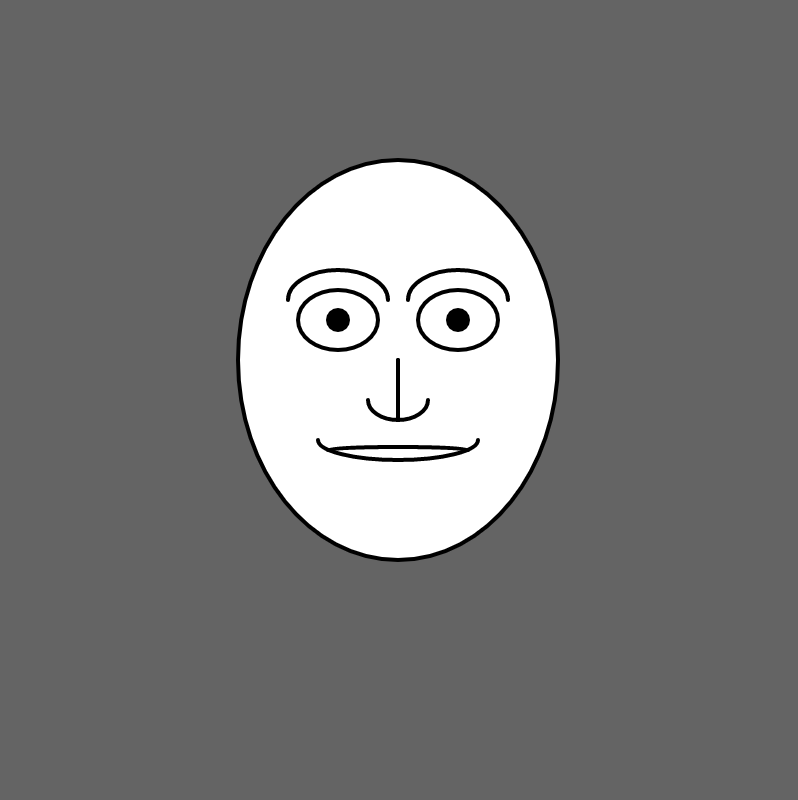
The code for my face is in the exercise3.js file in the 2-shapes folder. See if you can understand the code. Play around with it, maybe you can make a hat for the poor guy.